This make-up tutorial is a rather simple one, suited for those who aren’t yet really sure on how to create a really elaborate make-up or don’t have the courage to try one out yet. I go through these steps almost every time I put on make-up, so it can be used as both a cosplay make-up and a regular every day make-up tutorial, while paying attention to the choice of colours and other things such as glitter.
Remember, I did this make-up on my face, and what works for me might not work for everyone, so the most important thing is to learn about your facial features, know your best angles, and experiment to discover the colours you like best on you, and the type of make-up that makes you feel comfortable.
1Start with a clean, moisturized face. I recommend priming your face before applying foundation because it helps keep the make-up in place longer.

2Apply high coverage foundation and start rubbing it onto your skin with circular moves. Be careful to even it out and go a bit down your neck in order to avoid the mask effect.
3Consider your face to be an artist’s canvas; now it’s ready to get coloured. With a white eye pencil colour your eyes lower waterline. This will make your eyes look bigger.
4Then, with a black kohl pencil colour the outer corners of your eyes, both up and down, and try to draw a longer line exactly in the corner of your eye to make them look longer. Don’t worry too much if the lines aren’t perfectly even. Take orange eye shadow and colour your whole upper eyelid. I prefer using matte colours because if shine is needed I can always add it later.
5With white eye shadow colour the entire section from right under your brow up to your eyelid. Also add a touch of white on the inside corners of your eyes. It will brighten them up and it also creates a bit of distance between them, if needed.
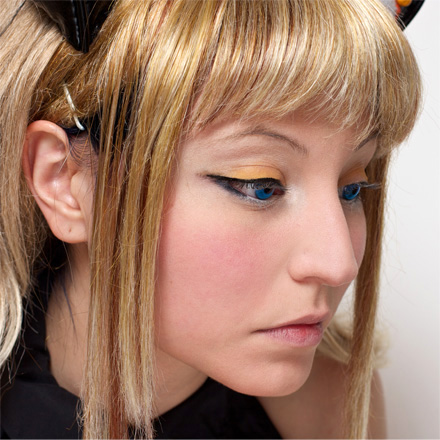
6Things should start looking like this. With a small, clean brush or sponge try to blend the colours together where the lines are too obvious. Take black eyeliner and contour your eyes, avoiding the part where you used the white eye pencil. I drew the line once, then waited a few seconds for it to dry; afterwards, I added a second layer to make the line a bit thicker and darker. I tried to draw the line a bit arched in the middle to give my eyes more of a dolly effect. Your eyes should now look a bit like cat eyes.
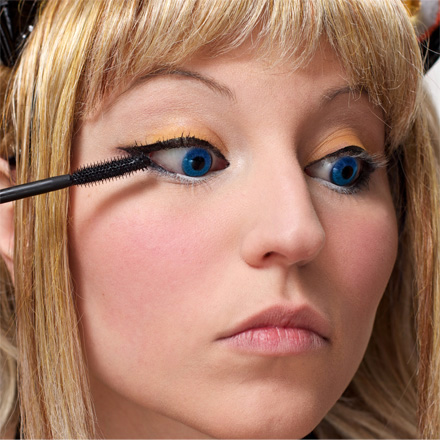
7Next step, lashes. You can either use fake, fluffy lashes or you can use mascara. It depends on how your natural lashes look. I used fake lash effect mascara, but feel free to use whichever you like the most. Mascara really makes a difference, and at the same time it helps correct small flaws like if your eyeliner line wasn’t really the straightest.
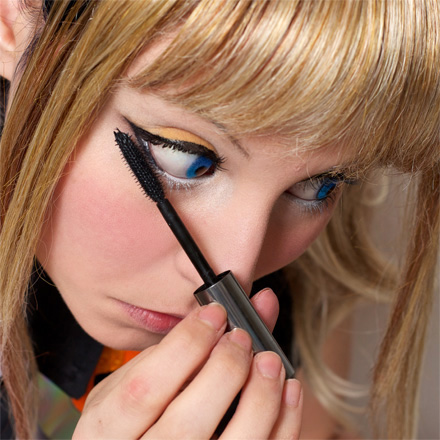
8Put on mascara or lashes on the lower lashes too, but only on the outer corners. Leave the inner part clean. If you are using lashes, here I recommend individual lashes, as they tend to look more natural.
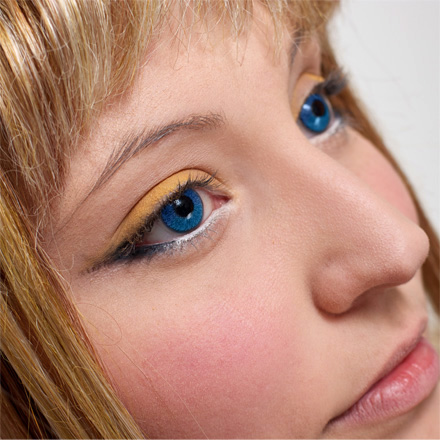
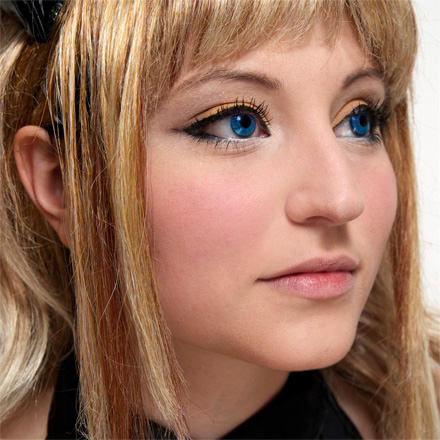
9Your eyes should look similar to this.
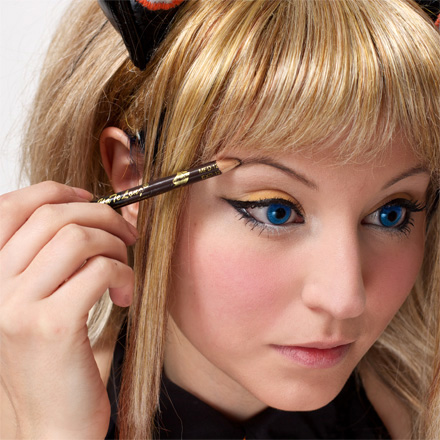
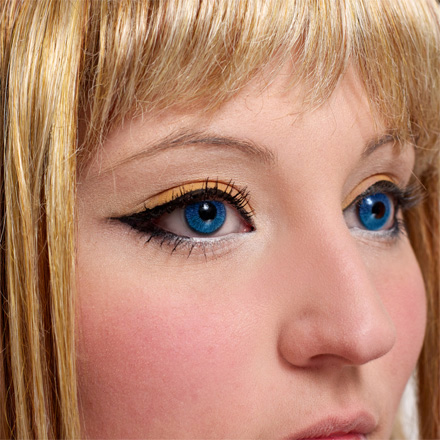
10Now let’s take care of the eyebrows. Take a brown brow pencil and create an arched shape in your brows. I have naturally narrow brows so it was easier for me to get to this step. Tweezers might be needed if your brows are naturally thicker. When colouring them try not to colour them too hard, but instead just softly draw a line next to the other, like you’d draw hair where you consider it necessary.
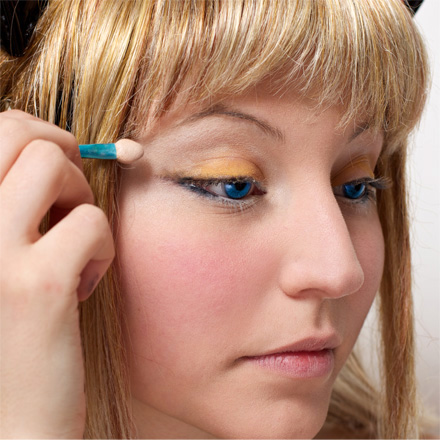
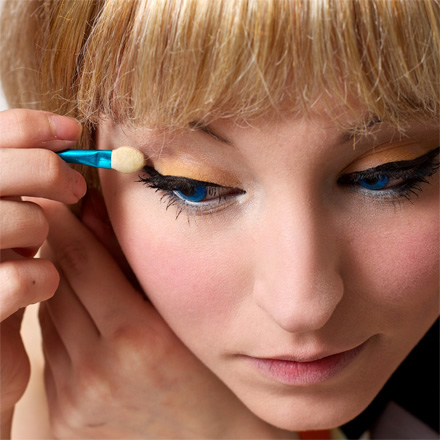
11In my case, I thought it was necessary to add a touch of darker eye shadow in the crease of my outer eyelid, in order to give my eyes a bit of depth. You can either try to do the same, or skip this step. If you do choose to use it, I’d recommend a touch of colour ranging from a matte brown to a darker orange or even a bit of dark red.
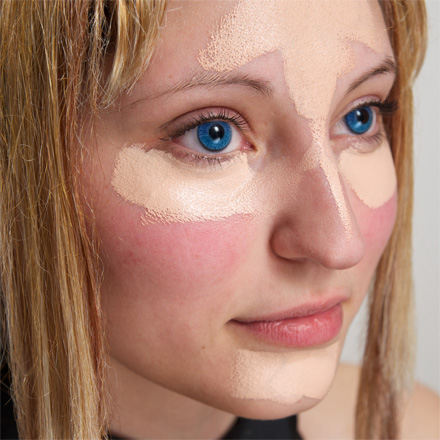
12Blend in with the orange and the white so everything looks neat. Depending on the shape of your nose you can add a touch of matte brown shadow starting from the inner corner of your brows and going straight down on the sides of your nose. This creates the effect of a narrower nose. I chose to add some silver glitter to the white eye shadow, just to give it a bit of sparkle. Again, it’s optional, but recommended; it gives the whole look a bit of extra charm. Eye make-up is done. Don’t be afraid to add something else if you feel like it; add some more sparkle, stick-on small stars, be creative and have fun. But first let us finish the rest of the face.
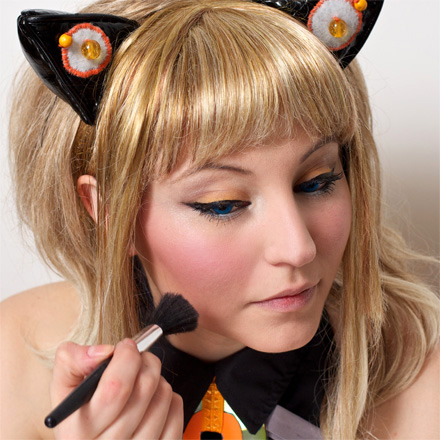
13Depending on the shape of your face, add some bronzing blush to make your facial features sharper, and then add some pink blush on the top of your cheeks. When applying blush, I’m smiling really wide and touch with the brush only the highest points of my cheeks. Add a layer of illuminating face powder on top of everything. It makes your skin sparkle and it gives a healthy, even look to your face. Plus, it looks really good in photos.
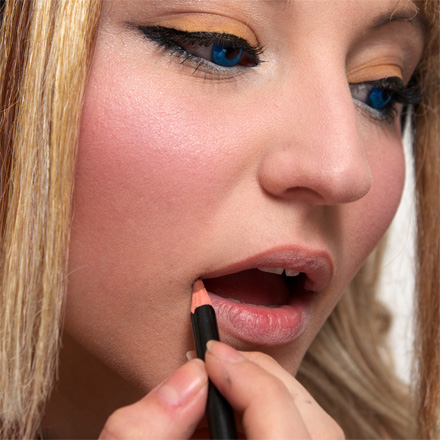
14Take a lip pencil in a colour as close as possible to your natural lip color and contour without making it too obvious. You don’t want your lips to look like they have a frame around them. It looks plastic and cheap. If you feel the contour is too strong, use your finger to smudge it a bit.
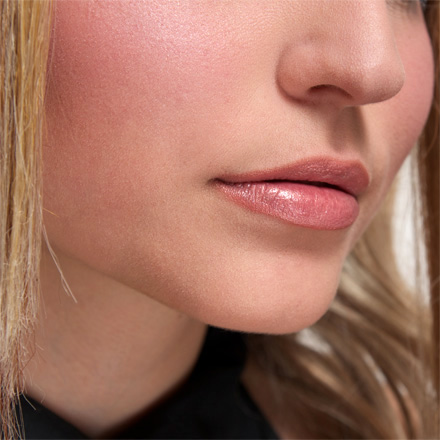
15Take a natural coloured lipstick that moisturizes your lips too and colour them. You want to have some colour but still keep the focus on your eyes.